Sunday, August 31, 2008

Deviously Delicious Iced Oat Sugar Cookies


I wanted to make colorful cookies that would be fun for the kids to eat, yet would secretly be filling them up with omega 3 fatty acids, protein, and whole grains. And I'm happy to announce that my plan worked.

My kids loved rolling out the dough and using the cookie cutters. This was my very first time making cookies with cookie cutters and icing them, hence the sloppy cookie decorating. That being said, I was pretty proud because the end result seemed to have far exceeded my artistic ability. I guess icing makes everything look good. :)

The cookies tasted amazing, they tasted like a sugar cookie with a hint of oatmeal. And the icing was soft with a semi hard exterior-- we thought it was the perfect combination and will definitely make these often.

Once again, my children have fallen for my deceitful treats.


Iced Oat Sugar Cookies:

Tip: You can make your own oat flour by putting rolled oats in the blender or food processor until finely ground. Or you can buy it at many natural food stores.
You can also not use the oat flour and/or ground flaxseed and simply replace it with all purpose flour.

Prep Time:
15 minute prep time, 1 hour to chill dough, 15 minutes cookie cutting,
Cook Time: Bakes for 7-9 minutes

Ingredients:
  • 1 1/2 cups confectioners sugar (powdered sugar, known in Australia as "icing sugar")
  • 1 cup butter
  • 2 eggs
  • 1 teaspoon vanilla extract
  • 2 cups all purpose flour
  • 1 cup oat flour (or finely ground rolled oats-- see Tip above)
  • 1/4 cups ground flaxseed
  • 1 teaspoon baking soda
The Method:
  1. In a large bowl cream together the confectioners sugar and butter until smooth.
  2. Beat in the eggs and vanilla.
  3. In a separate bowl, combine the flour, oat flour, ground flaxseed, and baking soda.
  4. Stir flour mixture into creamed mixture. Mix until thoroughly combines, but do not overmix.
  5. Cover the dough and chill for about 1 hour.
  6. Preheat the oven to 375 degrees F (190 degrees C).
  7. On a lightly floured surface, roll the dough out to 1/4 inch thickness.
  8. Cut into desired shapes with cookie cutters and place cookies onto an ungreased cookie sheet.
  9. Bake for 7-9 minutes or until edges begin to brown.
  10. Transfer cookies to wire racks to cool. When cool, eat plain or make the following icing to top with.
Simple Cookie Icing Recipe:

Tip: The less milk you use per bowl the thicker the icing will be. Use thicker icing to make eyes, buttons, or any detail work. Use thinner icing to coat entire cookies, and the thicker on top to add details. That being said, you may want to choose two colors to make thin, and two to make thick.

Ingredients:
  • 4 cups confectioners sugar, with one cup of sugar in four separate bowls to make different colors
  • 2 tablespoons milk per bowl (or less for a thicker icing to add details to the cookies like eyes, smiles, etc.)
  • 1/2 tsp vanilla extract per bowl
  • 3 or food coloring colors -- if you want white icing, don't add any color to one bowl
The Method:

  1. Place 1 cup of sugar 4 separate bowls.
  2. Add 2 tbsp milk (or less), 1/2 tsp vanilla and a few drops of your desired food color to each bowl.
  3. Mix thoroughly with a fork until icing is very smooth and a good consistency.
  4. Scrape each color into a small zip-lock plastic bag.
  5. Snip the corner of the bag to produce a point (make the point as tiny as possible) and ice cookies as desired. Use a spreader to evenly spread icing all over cookies. Carefully use thicker icings to make details on cookies. Icing will dry to a delicious semi-hard coating.
  6. Variation: use lemon or orange juice instead of milk for flavored icing.

Sunday, August 24, 2008

Simple Healthy Delicious Hummus


Hummus is a simple and delicious dip which can be a snack, a meal, or an appetizer. I make it pretty often and my kids love that I serve it to them atop a plate full of fun stuff to dip it in. Hummus is a great time to try out giving kids a muffin tin meal; you put the hummus in one muffin hole and a variety of dipping items in the others.

Other things I like to do with hummus in house:
  • Make wraps with hummus and various salad items.
  • Use hummus instead of mayonnaise on various sandwiches.
  • Serve it with: tortilla chips, carrots, raw broccoli, raw green beans, apple slices, wheat thins, pita bread warmed in the microwave with a moist papertowel on top.

It makes a great portable snack for a long day out with kids (or hungry adults for that matter). I put a little clear wrap over that hummus dipping bowl, and threw it our our bag to go to the playground with.

My Simple and Versatile Hummus Recipe:

Prep Time:
10 minutes

Ingredients:
  • 1 can chick peas (also known as garbanzo beans)- drained from can and rinsed with cold water
  • 1-2 cloves garlic
  • 1/3 cup tahini (optional) Tahini is ground sesame seeds, packaged in jar that looks similar to peanut butter-- sometimes found in the organic or health food aisle. I highly recommend using it if you can.
  • 1/2 teaspoon salt
  • A couple squeezes of a lemon, or a few drops of lemon juice from the bottle
  • A small cup of cold water to add if necessary
The Method:
  1. Put drained chick peas, garlic cloves, tahini (optional), salt, and a little lemon juice, and 1-2 teaspoons water into a food processor, blender, or mini food processor and go, go, go.
  2. Scape the sides and give it another whirl, if too stiff add another couple teaspoons of water and repeat. I would compare the desired consistency to soft serve ice cream-- thin enough to not need a spreader but thick enough to not look soupy.
  3. If you want to dress it up a little sprinkle a pinch of paprika or parsley on top. I don't do that when I'm serving it to my preschoolers-- but do it as you see fit :).

Monday, August 18, 2008

Broccoli Parmesan Risotto


I had never made risotto before and was totally shocked at how great this came out. The goal with risotto is to keep it from being crunchy/undercooked while also avoiding mushy, bland, or too salty-- these seem to be the normal concerns when making risotto. This risotto was creamy, flavorful, and not too heavy.

I served this risotto with a piece of salmon perched on top of it.

The real key to making risotto the right consistency is the method of adding simmering broth (and wine in so inclined) to the risotto rice one ladle at a time while constantly stirring and replenishing absorbed liquid
.

The video below displays the proper technique to make your risotto the right consistency. What we're looking at for in the video is the method and visuals of the desired consistency, I 'm using completely different ingredients-- but the method remains the same. The video chef made a mushroom risotto (which my husband won't eat) which sounds good too, or I've chocked my risotto full of spinach and broccoli, adding vitamins and flavor of the green variety.


Tip: As with all the recipes I post, you can change the ingredients based on your preferences or what you've got hanging around the house. The most important thing about adding ingredients is making sure you add them at the appropriate time. for example- broccoli should be added the last 5-7 minutes of cook time, or spinach should be added the last minute or two of cook time.

Let's make risotto:

Prep time: 10 minutes
Cook time: 25 minutes

Tips: A wooden spoon is best for cooking risotto with if you have one. Also, this recipe is best done when you have about 25 minutes to available to allow for stirring the risotto every minute or two.

Ingredients:
  • 1 or 2 onions diced
  • 2-4 cloves garlic crushed
  • 3 tablespoons unsalted butter, or salted is fine too
  • 1 teaspoon olive oil
  • 1 1/2 cups risotto rice rinsed in a colander, and looked through to make sure there's no foreign objects in it (I used Arborio)
  • About 4 cups chicken or vegetable broth-- if using stock instead of broth dilute 1/2 water & 1/2 stock
  • 1 or 2 cups fresh or frozen chopped broccoli (I use fresh)
  • 2 large handfuls of fresh spinach (or rocket if you prefer)
  • 1/2 cup Parmesan cheese, or up to 1 cup if you like more
The method:
  1. Heat the broth/stock in a saucepan until almost boiling, then lower heat to keep it lightly simmering.
  2. In a large saute pan or heavy pot, heat the butter and oil on medium heat. Add the onions and cook for about 2-3 minutes or until clear, do not let them brown.
  3. Add the garlic and cook for about 1 minute.
  4. Add the rice and stir to coat rice until shiny, about 2-3 minutes.
  5. Add one ladle of hot broth to the risotto and stir until absorbed.
  6. Repeat step #5, adding broth one ladle at a time, stirring until absorbed, then add another ladle at a time, for the next 18-20 minutes until most or all of the broth is used, when there's about 5 minutes left add the chopped broccoli and continue stirring.
  7. After 18-20 minutes taste a spoonful to make sure it's cooked (and not crunchy)-- DO NOT OVERCOOK, if it's not crunchy-- it's done!
  8. Turn off the heat and add the spinach (or rocket), blue cheese (optional), and Parmesan cheese, leaving a little to put on top when serving. Stir thoroughly and cover for two minutes to let rest.
  9. Serve in immediately, topped with a sprinkle of Parmesan cheese. Yum.

Thursday, July 31, 2008

Honey Mustard Crusted Salmon


The other night I made a salmon dish I got from my new blog friend Must Love Chutney.

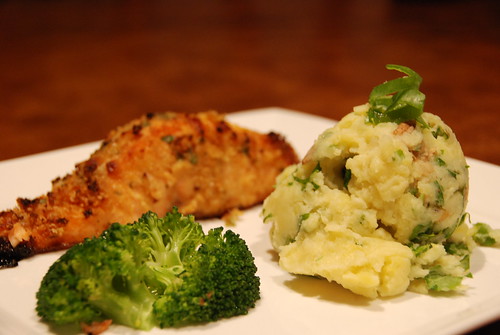
She called it Baked Honey Dijon Salmon, but I've been referring to it as Honey Mustard Crusted Salmon. It was delicious, I would say one of the best ways I've prepared salmon to date.


All dressed up and ready to bake.

Click here to see a great way to make delicious salmon and show off to family and friends. Must Love Chutney's Baked Honey Dijon Salmon Recipe

The only change I made was omitting the pecans due to a nut allergy in our house.
Thanks Must Love Chutney!


Even my picky three year old loved it.

Sunday, July 27, 2008

Peanut Butter & Jelly Cookies (or just Peanut Butter Cookies)- Deviously Delicious!


I kept seeing peanut butter cookie recipes this week all over the internet. Is July official Peanut Butter Cookie Recipe month? Weird.

I wanted a peanut butter cookie that had all the best characteristics: chewy, not cakey, somewhat fugdey texture, sweet, and salty. I also needed it to have enough healthy stuff in it to make me feel good about letting the kids eat them all week long-- my dirty little secret is that I make cookies packed with veggies, then let my kids eat them with breakfast. My Deviously Delicious Peanut Butter Cookies are full of carrots, stone ground whole wheat flour, and ground flaxseed. So in reality, they are Peanut Butter Carrot Cookies! And they are amazing, no-- I'm not bragging, they were really that good.


I made these two ways. I made half as plain Peanut Butter Cookies, and I made the second half as Peanut Butter & Jelly Cookies. Before baking, I rolled each cookie dough ball in a little raw sugar, which I normally would never do to a cookie. I think it definitely added to their delish-ocity-- and the bonus was-- it actually made them look sparkley and gorgeous (see photo at top).

Anyway, my husband and I, and our four year old preferred the ones with the "jelly". My three year old didn't want to try those, he wanted the plain ones. We all thought they were the best cookies we've made to date.


So if you want to eat your PB & J sandwich in the form of a cookie-- here's how to do it:

Prep Time: 25 minutes
Cook Time: about 10-11 minutes

Tips:
  1. Take the butter and eggs out of the refrigerator at least 30 minutes prior if possible.
  2. Use baking paper for best results.

Ingredients:
  • 3/4 cup butter (I used salted)
  • 2 tablespoons olive oil
  • 1 1/4 cup chunky or smooth peanut butter (I used half & half)
  • 1 cup sugar (I use raw), any whitish sugar is fine + a little extra to roll the cookies in before baking
  • 1 cup brown sugar packed
  • 2 eggs
  • 1 teaspoon vanilla extract
  • 1 carrot finely grated
  • 1 3/4 cups white flour
  • 3/4 whole wheat flour (I used stone ground whole wheat flour)
  • 1/4 cup ground flaxseed
  • 1 teaspoon baking powder
  • 1/2 teaspoon quality salt (preferably sea salt) + a little extra to roll the cookies in before baking
  • 1 1/2 teaspoon baking soda
  • 1/2 cup fruit spread- for filling if desired (I used strawberry preserves St Dalfour brand I think. I would definitely not recommend using jelly-- you want a jam or preserves/all fruit type)
C is for Cookie, it's good enough for me:
  1. In a large bowl cream butter, olive oil, peanut butter, and sugar together until blended.
  2. Beat in eggs.
  3. In a separate bowl combine white flour, wheat flour, ground flaxseed, baking powder, salt, and baking soda. Give a little stir.
  4. Stir dry ingredients into butter mixture. I use a hand mixer-- you use what you've got. Do not overmix.
  5. Fold carrots into batter. Do not overmix.
  6. If you have the time refrigerate the batter for 1 hour. If you don't, take out a softball size heap of the batter and put in a separate bowl, then refrigerate the rest until you are ready for it... and take it out one batch worth at a time... at least, that's how I did it.
  7. Put some sugar on a small plate to roll the dough balls in.
  8. One at a time, make 1 inch balls (I use my cookie scooper) and roll them onto the plate of sugar. -- tip: try not to touch the dough too much when rolling, you don't want them to get mushy or warmed by your hands.
  9. Place on cookie sheet, not too close together.
  10. If you want to make cookies without the jam filling proceed to #11. If you want to make with jam filling: 1) Take fruit spread and stir it vigorously for about 30 seconds with a small spoon to kind loosen it up. 2) Using the the tip or back of a small spoon (I used the back of my smallest. measuring spoon-- the 1/4 tsp.) make a slight indentation in the center of each cookie--do not flatten cookies. Just make a slight thumbprint-- hmmm, just realizing you actually could use a finger if necessary. 3) Then drop a small amount of fruit spread into the spot.
  11. Bake for about 10-11 minutes-- ok, maybe 12. You're looking for them to be golden brown, if they are still whitish go another minute or two.
  12. Immediately, carefully transfer cookies to a wire rack to cool.

Peanut Butter & Jelly Cookies- filled and ready to bake.

Just some additional info you may be interested in:

Regarding the salt: I used a soft pink, flaked salt. Now that I've been turned onto pink salt, I use it in almost everything, it's mild, light, flakey, and looks so gorgeous on food. On the other hand, any old salt will work!

Wednesday, July 23, 2008

Pesto, Pesto, it's the Besto


This recipe kills three birds with one stone-- wow, that's really doesn't sound like a nice thing to say. This recipe can be made three ways: Rocket Pesto, Arugula Pesto, or Spinach Pesto- yum, yum, and yum.

As you will see below, cream cheese is an excellent complement to pesto, so they are very often paired together.

Here's some ways I recommend using your pesto:
  • Over pasta as a sauce.
  • On pizza instead of tomato sauce, or in little dollops- as a topping.
  • Toast a hearty bread, spread some cream cheese on, then spread pesto over the top. Add a tomato on top, and a basil leaf if you're so inclined. This is my favorite use for pesto.
  • On crackers with cream cheese.
  • Make into a torta by layering pesto, cream cheese, and sundried tomatoes-- probably best done on a springform pan.
  • Use on sandwiches instead of mayo or mustard.
  • Coat chicken in and bake.
  • In/ on omelettes or quiche.

Pesto on toasted 5-seed bread, topped with cream cheese, pesto, tomato, and basil.

How to make it all happen:

Prep Time: 10 minutes

Ingredients:
  • 1 1/2 cups either rocket, arugula, or spinach
  • 1 1/2 cups fresh basil
  • 3/4 cup (approximately) pine nuts
  • 1/2 cup Parmesan cheese (I used mostly freshly grated, but when I didn't have enough I added some store bought grated from a bag)
  • 1/3 cup extra virgin olive oil
Making pesto is super easy:
  1. Toast the pine nuts for a couple of minutes. I just stuck them in the toaster oven on baking paper and turned the dial to "lightly toast". Some of them burned on, but I tasted them and they were delicious burnt, so I still used them in the pesto.
  2. Throw toasted pine nuts and all remaining ingredients in the food processor, or blender if you don't have a processor-- and turn it on.
  3. Turn off and scrape the sides, then give it a go again-- add more oil olive if it's too thick. Personally, I like it thicker and less oily, but if you like it thinner (for using over pasta especially) add more oil.
  4. Taste it before serving it to people, to make sure it's delicious-- if not salty enough, add more Parmesan or a little salt.

Tuesday, July 22, 2008

On top of Spaghetti- Meatballs... or Turkey Meatballs, or Chicken Meatballs-- Your Choice.


Whenever I feel like eating real Italian Homestyle Cooking in the comfort of my own home, I go to these meatballs. I usually make a double batch so I can freeze some, or we just eat them in all sorts of way over a few days.

The trick here is that they taste best when you use a combination of meats-- or you can use just ground turkey/chicken if you want turkey or chicken meatballs. I bought 2lbs (1 kilo) of ground meat-- 1/3 chicken, 1/3 veal, 1/3 pork. You could also use beef instead of chicken, I don't think it makes a big difference in taste either way.

Way to use your meatballs:
  • The obvious-- Spaghetti and Meatballs
  • As a topping on homemade pizza
  • Meatball sandwiches, top with a little red sauce and possibly mozzarella cheese
  • Heat them up and put on top of a salad-- no, I'm serious-- it's really good
Here's how to make delicious Meatballs:

Prep Time: 10 minutes
Cook Time: 60 minutes

Tip: For the 2lbs (1 kilo) of ground meat required I recommend using 1/3 ground chicken or turkey, 1/3 ground veal, and 1/3 ground pork. More traditional Italian cooking will use 1/3 ground beef, 1/3 ground veal, and 1/3 ground pork. OR they are excellent using only ground chicken or turkey!

Ingredients:
  • 2 lbs. ground meat (see tip above for which meats are best together-- chicken, turkey, pork, veal, & beef)
  • 2 eggs (a good rule of thumb in this type of recipe is 1 egg per pound (1/2 kilo) of meat
  • 1/2 cup of milk or less-- to make moist
  • 1/2 cup of bread crumbs
  • 1/2 cup or more finely chopped flat leaf (aka- continental) parsley (preferably) OR about 1 1/2 tablespoons dried parsley
  • 1 cup either grated Romano cheese or grated Parmesan cheese-- I've used both and they taste almost identical
  • 1 teaspoon salt
  • Olive oil for frying
How to get on top of spaghetti:
  1. Wash your hands, because you're going to mix with them.
  2. Combine all ingredients except olive oil, and mix with your hands until everything is incorporated together.
  3. Form little meatballs with your hands-- mine are normally a little larger than a ping-pong ball-- you get to choose your own size here.
  4. Pour about a 1/4 inch of olive oil in a large non-stick frying pan and heat on medium low.
  5. When oil is hot, carefully place meatballs in pan making sure they are not touching each other. Make sure oil is not too hot (splattering).
  6. Let first side brown --probably about 5 minutes. Then using tongs (so they don't break), flip them over and brown the other side.
  7. After about 5 minutes check browness (I like mine well done-- see photo).
  8. Lastly, with tongs-- I like to turn the meatballs on their sides and cook the edges-- so basically I end up with somewhat of a crispy outside, all the way around.
  9. When all sides of the meatballs are browned I place them on top of paper towels on a plate to cool.
  10. See above for numerous ways to devour your meatballs. Yum!


Wednesday, July 16, 2008

Coconut Chocolate Chip Oatmeal Cookies- Deviously Delicious!


I've just started baking within the last couple of years-- oh no, that's not correct-- I just started baking things that taste delcious in the last couple of years.

My kids and I made these cookies this past weekend and they were amazing. We ate the entire first batch before the second was even finished baking.

One tip which I think has made a marked improvement in my results is: take the butter and eggs out of the refrigerator about 30 minutes prior to take the chill out of them.

A second tip someone turned me on to was using baking paper (click here to see). This stuff rocks. I no longer need to grease cookie sheets (and I use it to bake salmon on too!)-- and then easy clean up. I cannot believe I have been cooking this long with out it!


So here's a recipe for yummy cookies which you will love:

Prep Time: 20 minutes
Cook Time: 9-11 minutes per batch

Ingredients:

*Tip- if you do not have whole wheat flour, rolled oats and/or ground flaxseed you can substitute the missing amount of either/all with regular flour.
  • 1 cup butter
  • 1 cup sugar (I use organic raw sugar)
  • 1/2 cup light brown sugar
  • 3 eggs
  • 1 teaspoon vanilla extract
  • 1/2 teaspoon coconut flavoring (optional)
  • 1 1/4 cups all purpose flour
  • 1/2 cup whole wheat flour (I try to use organic stone ground whole wheat flour)
  • 1/2 cup rolled oats
  • 1/4 cup ground flaxseed (also known as ground linseed)
  • 1 teaspoon baking soda
  • 1 teaspoon salt
  • 2 cups semisweet or dark chocolate chips
  • 2 cups sweetened flaked coconut (unsweetened is fine too)
How to make the cookies:
  1. Preheat the oven to 375 degrees F (190 degrees Celsius).
  2. In a large mixing bowl, cream together the butter, brown sugar and white sugar (I use a hand mixer-- you can use a stand mixer or just a wooden spoon-- but the wooden spoon would be a lot of effort)!
  3. Add the eggs one at a time, beating them into the mixture.
  4. Stir in the vanilla and coconut flavoring (optional).
  5. In a separate bowl combine white flour, wheat flour, ground flaxseed, baking soda, and salt.
  6. Add the dry ingredients slowly to the sugar, butter mixture and stir (by hand or machine) until evenly blended. Do not over mix.
  7. Fold in the chocolate chips and flaked coconut.
  8. Drop by rounded spoonfuls (I use my scooper) onto either a greased or paper lined cookie sheet.
  9. Bake for about 9-11 minutes in preheated oven. Carefully transfer cookies to a wire rack to cool.


Deviously Delicious-- what's it all about?

When I tag a recipe as Deviously Delicious, it means that this recipe is full of unexpected, secret ingredients which are healthy, nutritious, and actually improve the way things taste!

The main 3 components in my nutrition arsenal are as follows:

Wet ingredients for baking: Until you have baked with zucchini, beets, or carrots you don't realize they actually add huge amounts moisture, flavor, and nutrition to cookies, cakes, breads, and brownies... it's incredible. No seriously-- it's shocking, try it-- you don't substitute with these items, simply add them to an existing recipe.

Dry Ingredients for baking and/or breading: When working with dry ingredients, I like to substitute some or most of the white flour with ground flaxseed (also known as linseed), stone ground whole wheat flour, oat bran flour, and rolled oats. I think both children and adults alike, prefer the heartier textures and tastes that these minimally processed, more satisfying ingredients bring to the table (literally, of course).

Ingredients for cooking (sauces, casseroles, etc.): I have some staple items which I incorporate into just about everything. Spinach is probably numero uno on my list. I chop it finely (so it looks like an herb) and throw it into sauces, rice, pasta, casseroles, chili, quesadillas-- seriously---anything! Tip: The trick to spinach is to add it only the last 2-4 minutes of cooking. This is short cook time is important and beneficial for several reasons: a) the flavor will not permeate into the entire dish b) if cooked too long spinach can taste bitter c) the longer you cook it, the more nutrients you lose. So listen-- and listen good-- do not add your spinach for more than a few minutes!

Other favorites I throw into stuff I make are: finely diced carrots, frozen peas, cauliflower chopped very small (like pea size pieces).

So this is currently my most used repertoire of healthy stuff I shove in my family's food and they eat with huge smiles on their faces. In fact, in my house it's not really all that devious-- because my kids actually wash and tear apart the vegetables we are adding to sauces, rices, etc. And they measure the cups of flaxseed we use when baking-- so they know it, and they are all over it- and begging for more!

So now you know-- when you see Deviously Delicious after the name of a recipe on my site-- we're talking delicious, and full of stuff that makes you feel so good!

Saturday, July 12, 2008

Parmesan Crusted Cauliflower & Brussel Sprouts


When I went to the butcher the other day and my older one said, "Mommy, will you make brussel sprouts with that?", I beamed with pride-- all my efforts have paid off (for now of course, I'm not that naive).

Everyone I meet says they don't like brussel sprouts-- but they probably just don't know how to make them taste delicious!

I on the other hand, have never been a fan of cauliflower-- that is, until a couple of weeks ago when my organic delivery service sent me a "mixed box" and I decided to venture out and threw them in the mashed potatoes. I think they're kind of a less flavorful- more mild tasting, broccoli-ish vegetable.

Brussel sprouts are really like eating teeny, tiny, and very cute cabbages. I love them now that I know how to prepare them in a couple of fabulous ways.


Here's the scoop on how to get the yum factor:

Prep Time: 5-10 minutes
Cook Time:
15 minutes

Ingredients:
  • 1 lb. (about 500 grams) brussel sprouts (the smaller and harder the better)
  • 1/2 lb. (about 250 grams) cauliflower cut into small/bite size pieces
  • 2-4 tablespoons olive oil
  • salt (preferably a good sea salt)
  • 1/2 cup finely grated Parmesan cheese
Tip: If you buy a chunk of Parmesan it will stay fine for months in the refrigerator, and it takes 30 seconds to grate it with one of these.) OR, Costco sells this huge bag of refrigerated, good quality grated Parmesan cheese. You can keep a cup of it in an air-tight container in the refrigerator, and store the rest in the freezer-- when you are ready for a refill, it's like an endless supply at your fingertips! --Thanks Erika for that advice a few years ago, see I am a good listener.

The path the your veggie dreams:
  1. Cut the end off each brussel spouts (the flat bottom part), then slice brussel sprouts in half -slicing down the middle of the flat part (you want them to stay held together while sauteing).
  2. Pour about 2 tablespoons olive oil into a non-stick pan.
  3. Before heating oil, add the brussel sprouts to the pan with the open- flat side facing down (this will cook them inside before we start moving them around in the pan with the cauliflower).
  4. Turn heat on medium low, and make sure pan is doesn't get too hot, so they don't brown too quickly.
  5. Sprinkle some salt over the top (probably about 1/2 tsp.), and let cook untouched for approximately 5 minutes or until they are brown (but not burned) on the bottom.
  6. Add chopped cauliflower, a little more olive oil, and another sprinkling of salt to the pan and stir.
  7. Let saute about 5-10 minutes more, they are cooked when you can stick a fork into the brussel sprouts and cauliflower.
  8. Generously sprinkle grated Parmesan cheese over top before serving.

Tuesday, July 8, 2008

Oatmeal Date Carrot Breakfast Mini Muffins


My boys put on their aprons and chef costumes, get up on their step stools, and help me make these. They put the muffin liners in, they "help" measure, they crack eggs.
They eat lunch while the muffins bake, and then they get rewarded for all their hard work by hitting the all-you-can-eat-mini-muffin-buffet!

I'm not sure if you can appreciate how much enjoyment I take in watching my little studmuffins eat their mini-muffins filled with carrots, dates, flaxseed, and oatmeal-- then beg for more.
Sure honey, have another. Eat up little guys, make mama proud.

The next few mornings the kids each get a muffin after their breakfast. The kids think they're getting a fabulous treat, and it's all good.

Prep Time: 25 minutes
Cook Time: 10-12 minutes-- You can also make regular size muffins, mini-loaves, or regular size bread loaves see time chart at bottom for other sizes.

Ingredients:

*Tip-
if you do not have whole wheat flour and/or ground flaxseed you can substitute the missing amount of either/both with regular flour
  • 1 1/4 cups quick cooking oats or rolled oats
  • 1 1/4 cups milk
  • 3 eggs
  • 1/2 cup vegetable oil (or rice bran oil)
  • 1 carrot finely grated
  • 3/4 cup packed brown sugar
  • 3/4 cup of chopped dates (probably about 4 dates chopped)
  • 3/4 cup semi-sweet or dark chocolate chips
  • 3/4 cup flour
  • 1/2 cup whole wheat flour
  • 1/4 cup ground flaxseed (also known as linseed)
  • 3 1/2 teaspoons baking powder
  • 1 teaspoon salt
  • 1 teaspoon ground cinnamon
  • 1 cup chopped pecans (optional, I don't use nuts)
How to become the muffin man:
  1. Combine oats and milk and let stand for 15 minutes.
  2. Preheat oven to 400 degrees F (205 degrees Celsius).
  3. Line mini-muffin tin with paper liners or grease the mini-muffin tin.
  4. In large bowl combine oat & milk mixture, egg, oil, brown sugar, grated carrot, chopped dates, chocolate chips, and pecans (optional).
  5. In a separate bowl combine regular flour, whole wheat flour, ground flaxseed, baking powder, salt, and cinnamon. Stir around a little.
  6. Add bowl of dry ingredients to large bowl of wet ingredients and stir only until everything is moist (do not overstir).
  7. Fill mini-muffin cups to top, but not overflowing. Tip: I use a small ice cream scooper --click here to see what I use-- to get just the right amount and squeeze the handle for a perfect drop everytime!
  8. Bake at 400 degrees F (205 degrees Celsius) for about 10-12 minutes. Stick a toothpick in the center of a couple, if it comes out clean- they are done.
  9. Remove from oven and put muffins on a cooling rack or the counter is just fine.
  10. Reload and throw in the next batch, repeat until all batter is done. I think it made about 48 mini-muffins.
  11. Yum, yum-- go eat some!!!
Cook times for other types of breads/muffins: (this is my standard guideline chart I use for all bread/muffins)
  • 30-40 minutes for mini-loaves
  • 55-65 minutes for regular loaves
  • 10-15 minutes for mini-muffins
  • 25-35 minutes for regular size muffins
  • Stick a toothpick in the center and if it comes out clean, they are done.


Slow Cooker Beefy Barley Bean Soup


I have pneumonia. I need soup.
I threw it all in a slow cooker and hoped for the best-- and it came out damn good.
This is a thick soup... stew-esque. Soup that eats like a meal. Mmmm good.

Prep Time: 10 minutes
Cook Time: 10-12 hours

Ingredients: (these are all guestimates of the amounts I actually used-- use however much you want of everything-- and feel free to add any dried beans you like- I don't mind at all if you do!)
  • 1-2 lb. (a little less than 1 kilo) beef brisket with all fat trimmed off
  • 1 or 2 cans diced tomatoes
  • 1 cup pearl barley
  • 1 cup dried red kidney beans
  • 1 cup dried large lima beans
  • 1 cup dried green lentils
  • 1 cup dried red lentils
  • 1 carrot diced
  • 1 packet onion soup mix-- I could only find French onion soup mix, so that's waht I used
  • 1 cup broth (vegetable, beef, chicken-- not sure it matters)
  • salt
  • water to cover it all
The way I made my soup:
  1. I cut the brisket into about 6 pieces so it would cook easier. I considered cutting up it more, but decided to let it just cook and kind of shred on its own. It will shrink greatly in the crockpot.
  2. I put the meat in first, then added everything else.
  3. Give it a little swirl with a plastic or wooden spoon.
  4. Add enough water to cover everything and then about an inch extra-- you can always add more later if you don't want to put too much in.
  5. Cook in crockpot for 10-12 hours on low (see tips), until beans and meat are tender and delicious--Tip #1: After about 6 hours I skimmed the top of the soup with a large spoon to remove the foamy bubbles from the top-- toss that stuff away. Tip #2: Mine had cooked about 10 hours but I thought it needed more-- it was midnight and I decided to leave it on until the morning on "warm". Turned it off at 8am and it was great.
  6. Before serving, taste-- add salt-- probably will need a few teaspoons of salt. OR don't add salt and let each eater add it themselves... but definitely add it, cause it will greatly enhance the soup.
  7. Garnish (optional)-- if you have a large grained salt, you can garnish with a pinch of salt on top.

Sunday, July 6, 2008

Vegetable Fried Rice, Yum!


I've been making this fried rice for years. The most important thing here is to use leftover refrigerated rice. When we eat Chinese or other Asian food we usually order an extra side of white rice so we can make this later in the week. You can also use leftover brown rice, rice pilaf , etc... it's fine.

This is so fast and easy, great for a quick dinner or fast side dish.
Making this is in a wok is easiest if you have one.

Prep Time: 5 minutes
Cook Time: 10 minutes

Ingredients: (Use as much as you like of each item. More onion? More egg? It's all good).
  • 2-4 cups cold cooked rice
  • 2 tsp. oil (vegetable oil, rice bran oil, or grapeseed oil)
  • 1 yellow or brown onion diced
  • 1 carrot finely diced or cut into matchsticks
  • 1 cup frozen peas
  • 1 cup frozen corn
  • 1 or 2 eggs
  • 1 cup fresh or frozen broccoli florets
  • low sodium soy sauce or regular if you prefer
  • a little salt
  • a little pepper
  • feel free to use other veggies like bok choy, green beans, mushrooms, etc.
  • 1-2 tsp. sliced green onion, for garnish (optional)
The way to make yummy fried rice:
  1. Put diced onions and carrots in wok/pan with oil and cook for about 5 minutes on medium.
  2. Add broccoli, peas, corn and any other veggies. Cook for about 5 more minutes, add a little more oil if too dry.
  3. Add about 1/2 tsp. salt (a few pinches) and pepper (optional), and stir.
  4. Move all veggies to sides of wok/pan, and make a "well" in the middle.
  5. Crack egg/s into middle of well and scramble it up in the center of the pan until cooked.
  6. When egg is cooked, mix it into the vegetables.
  7. If rice needed to be separated-- pick it up in your hands and crumble in into the pan. Otherwise, put rice in wok/pan and mix everything together.
  8. Once mixed, pour (and stir while you pour) some soy sauce over the top until the desired color/amount is reached. Don't pour too much or it will be too wet and too salty. You can always add more after tasting it.
  9. After the rice is heated through, take a fork and taste it.
  10. If it tastes bland, add more salt (and/or soy sauce) and mix thoroughly.
  11. Garnished with sliced green onion on top, if you like it pretty.

Tuesday, June 24, 2008

Delicious Zucchini Carrot Bread & Muffins


When we lived in Dallas we used to go to this awesome place called Breadwinners. It was pretty much a breakfasty, lunch place and they sold these amazing mini-loaves of bread-- the zucchini spice, a moist zucchini bread with a cinnamon-y flavor, was a favorite of ours. And I have been successfully recreating different versions of this bread over the last few years.

This time I had so many carrots I decided to throw one in, making it Zucchini Carrot Bread. The key here is the most zucchini, carrot, blueberries, etc. that you throw in the moister the bread ends up-- but don't over do it or it will never finish baking.


One variation we make all the time at home is Zucchini Blueberry Bread-- which you can easily change this recipe to by omitting the carrot, and adding blueberries. If you make it with blueberries just take note that using frozen blueberries will kind of make a blueberry swirl effect as the blueberries kind of melt and spread blueberry juice throughout the batter. Fresh whole blueberries will stay together and not make everything turn bluish. I've used both, and both taste great... just look a little different.

Personally I think it's all about the crusty outside with the moist yummy inside-- so to have as much crust at possible I recommend making mini-loaves instead of a regular size loaf. This time around with the recipe amounts below we made two mini-loaves and 12 mini-muffins (the tiny muffins). By the way, the muffins were gone within the first 20 minutes.

Here we go...

Prep Time: 20 minutes
Cook Times: Varied depending of bread tins, muffins, etc.

Ingredients:
  • 3 eggs
  • 1 cup oil -either vegetable, rice bran, or I think grapeseed would work well-I used rice bran
  • 2 cups sugar - I used organic raw sugar, use what you've got or like
  • 2 cups finely grated zucchini= about 2 medium zucchinis in the food processor
  • 1 cup finely grated carrot= 1 carrot- put in food processor at same time as zucchini
  • 2 teaspoons vanilla extract
  • 2 cups flour
  • 1 cup whole wheat flour --if you do have have wheat flour just use an extra cup plain flour
  • 3 teaspoons ground cinnamon
  • 1 teaspoon baking soda
  • 1/4 teaspoon baking powder
  • 1 teaspoon salt
The method to my madness:
  1. Preheat oven to 325 degrees F (165 degrees C). Grease and lightly flour loaf pans, or line muffin tins with paper bake liners.
  2. In a large bowl, beat eggs until light and frothy.
  3. Mix in oil and sugar.
  4. Stir in grated zucchini/ carrot mixture and vanilla.
  5. In a separate bowl combine flour, cinnamon, soda, baking powder, and salt.
  6. Add bowl of dry ingredients to egg mixture and blend-- it is kind of soupy, and that's okay.
  7. Pour batter into prepared pans filling whichever type you are using about 3/4 full.
  8. Cook times:
  • 30-40 minutes for mini-loaves
  • 55-65 minutes for regular loaves
  • 10-15 minutes for mini-muffins
  • 25-35 minutes for regular size muffins
  • Stick a toothpick in the center and if it comes out clean, they are done.

Sunday, June 22, 2008

Cheesy Cauliflower Mashed Potatoes


Po-tah-to, potato, po-tah-to, potato, let's call the whole thing off, doo-wah. Wow, that's an annoying song, and I can't call the whole thing off because I live in Australia and I am the only one who says potato.

Whateva,--anyway-- I rarely make potatoes, but I think they are pretty much a requirement to go with brisket-- and since we ate brisket all week--- well, nuff said.

I just started throwing stuff in (as usual)-- and they were awesome. The four year old foodie ate them non-stop for the last few days.

Here's what I did to make it all happen:

Prep Time: 15 minutes
Cook Time: 10 minutes

Ingredients:
  • 5 medium brown potatoes (I'm guessing about 2lbs or 1 kilo)
  • 1/4 head of cauliflower
  • 1/2 cup milk (skim, whole, 2%- your call) you can add more later if potatoes are too dry
  • 3-4 tbsp sour cream (regular or light)
  • 1 cup shredded cheese (I used mozzerella, but you could use cheddar or colby jack)
  • 2 tbsp finely chopped green onion
  • 1 tsp salt-- or to taste
  • a little pepper
The way to bring it all together:
  1. Wash cauliflower and in a microwave safe dish microwave it covered for 3 1/2 minutes. Then set aside.
  2. Scrub potatoes and pierce them several times with a fork or knife-- for goodness sakes-- be careful and don't stab yourself!
  3. Put 1/2 the potatoes in microwave on a papertowel for about 5 minutes. When finished using an oven mitt see if they are soft, if not microwave for another 3 minutes. When you can squeeze them and feel soft- they are cooked. Remove from microwave and microwave the rest of the clean potatoes.
  4. Put shredded cheese in a large mixing bowl.
  5. Holding potato with oven mitt, cut in half and scoop insides of potatoes into the bowl with the cheese. You can save the skins if they are still in good shape to make potato skins later.
  6. When potatoes are scooped into the bowl, add the cooked cauliflower and all remaining ingredients. Mix with a potato masher.
  7. Serve immediately or pop into microwave right before serving.
  8. Garnish with a little extra green onion on top if you feel like it.


Friday, June 20, 2008

Slow Cooker Brisket


My entire life my grandmother and mom made this amazing brisket, especially during the holidays. A few years ago I finally decided I would put on my big boy pants and try to make it myself. So let me just say that making brisket in the oven is a total pain. You have to take it out of the oven, baste it, add water, turn it, move the onions around... and then a mere 5-7 hours after you've begun it's finally ready. It is one high maintenance meal. Delicious, but who has the time for that kind of cooking commitment?

So I decided to try the brisket in the slow cooker. I'm thinking-- no basting, no flipping-- just let it stew on its own and at some point turn it off.


Prep time: 5 minutes
Cook time: About 10-11 hours of not having to touch it even once

Ingredients:
  • 3-4 lb. (a little less than 2 kilos) beef brisket
  • 1 jar Heinz (it must be Heinz) chili sauce OR 2 cups ketchup mixed with 2 tsp. brown sugar, 2 tsp. dried onion flakes, and a little garlic powder
  • 2-3 yellow or brown onions sliced thick
  • 1/2 tsp. salt
Technique:
  1. On a cutting board, trim all visible fat from brisket- I do this was a cheap serrated knife.
  2. Put 1/2 of the sliced onion in bottom of slow cooker.
  3. Put brisket on top of onion, if too big fold edges up the sides or fold the whole thing in half. It is going to shrink in a big way.
  4. Add about 1 cup of water to the crockpot.
  5. Pour chili sauce or ketchup mixture over the whole thing, use the back of a spoon to coat top of brisket with sauce.
  6. Put remaining onions on top of brisket.
  7. Turn slow cooker on low and cook 8-11 hours, until meat can easily have a fork stuck into the middle of it.
Serving it up:
  • After it cools about 30 minutes to an hour, remove brisket from crock pot and slice with a large serrated/ or bread knife against the grain-- this means if the brisket is shredding do not cut it the same way the beef is shredding-- cut across the shredding, not with the shredding. Ladle some sauce with onions over sliced meat on each plate.
  • Excellent served with sweet potatoes or mashed potatoes, and green beans.
  • Store meat in separate container from sauce/onions.
  • If you have a ton of sauce (like I did), freeze a small container of it to use to bake chicken in at some point.
This is how much I ended up with-- when you make this in a slow cooker it makes a ton of gravy.


To give you an idea of scale...that meat container is about 8 inches high.

Pretty Tuna Salad


Yeah, like I really thought anyone needed instructions on how to make tuna salad-- but sometimes it's good to hear how someone else does it.

You actually can pretty up tuna salad by adding a splash of color using red capsicum (that's Australian for red bell peppers-- and if you say red bell peppers in Australia, I don't think anyone will know what the hell you are talking about).

Both my kids like this... a lot. I've been putting it on wholemeal bread (that's Australian for wheat bread), quartering it diagonally, and cutting the crust off. It is also lovely served with crackers, or atop a salad.

For me it's all about the red bell peppers in it, but if you're like my husband and "hate peppers", then feel free to substitute celery. But for goodness sakes, I am begging you-- please do not add that nasty sweet relish... mom, that means you.

Prep Time: 5-10 minutes

Ingredients:
  • 1 large can (not those little mini cans) tuna packed in water
  • 1.5 tbsp Hellman's Mayonaise or Light Hellman's Mayonaise-- other brands just will not do in my opinion
  • 2-3 tablespoons diced red bell pepper (aka red capsicum)
  • 1-2 tablespoons dried onion flakes (the kind that come in a spice bottle--looks like dehydrated little pieces of onion)
  • 2 small pinches salt
  • A little pepper
  • (optional) 1-2 tbsp diced celery-- personally I don't do this, except for in my husband's portion which has no red bell pepper in it
The method of my madness:
  1. Squeeze water out of tuna can well.
  2. Put tuna in bowl and use a fork to smash it until not in chunks anymore.
  3. Throw in all the other ingredients (only 1 spoon of mayo at a time, you can always add more--but too much is just totally unacceptable) and mix with fork.
To serve on a salad:
  • Put lettuce or spinach in a bowl
  • Use an ice cream scooper to make a pretty round scoop of tuna salad on top
  • Add little veggie decorations around it like broccoli, green beans, cucumber, carrot--whatever
To serve on a sandwich:
  • Stick it on bread
  • For kids cut into quarters or let kids make them into shapes with cookie cutters
  • Cut diagonally for adult sandwiches

Monday, June 16, 2008

Chicken Enchiladas, Yum.


This is one of our favorite recipes. As with all the dishes I make on a regular basis--this is more of a loose guideline, than letter of the law. You will basically need the good part of a morning or afternoon to make this. A good pointer is that you can get the whole thing ready, refrigerate it in a casserole dish, and pop it in the oven about 45 minutes before you want to eat.

And yes, I know black beans and rice are not the most Mexican choice for a side dish, but when you are in a country lacking in the Hispanic ingredient department- you do what you can.

Prep Time: 60-90 minutes depending on if chicken is already cooked
Cook Time: 60 minutes

Ingredients:
  • 1.5 lbs (about .75 kilo) uncooked boneless chicken breasts OR you can use 1 premade rotisserie chicken and shred the whole thing (should be about 4-5 cups cooked shredded chicken)
  • 2 large onions- chopped
  • 2 small cans green chiles (unless you live in Australia, because I still have yet to find them here)
  • 4 tbsp. olive oil
  • 2 cloves garlic- pressed
  • 2 16oz. (about 800ml) cans tomato sauce/ tomato puree (in the U.S. I like Hunts brand)
  • 1/2 tsp. salt
  • 1/2 sugar
  • 2 jalapenos - very finely chopped(optional)
  • 6 cups milk or cream or a combination of both (but skim milk alone will not be a good choice, we're looking to cream it up a little)
  • 10 cubes chicken bouillon
  • 24-36 corn tortillas
  • 3 cups shredded cheese (monterey jack, colby, cheddar-- which ever you prefer or a combo)
  • 1 cup salsa
  • Sour cream (optional- as an accompaniment)
Tip:
  • You can make this one of two way- 1) traditional rolled enchiladas baked in a large casserole dish OR 2) Casserole/lasagna style-- this is the quicker version, probably saves at least 10 minutes. The below technique is for individual enchiladas. I will include below the very simple modification to make the faster casserole style dish instead.
Technique:
  1. Saute onion in olive oil until clear, but not brown.
  2. Stir in garlic, tomato sauce, salt, sugar, green chiles, jalapeno, and chicken.
  3. Cover and simmer on low for 5 minutes.
  4. In a large saucepan heat milk & dissolve bouillon cubes in it. Careful to heat on low to avoid scorching milk. Turn off when bouillion is dissolved and set aside.
  5. Heat tortillas (about 10 at a time) in the microwave-- I recommend putting them on a plate with a barely moist papertowel over them for about 30-45 seconds.
  6. (See note below instructions to make faster casserole style). Dip a tortilla in the milk/bouillon mixture, lay tortilla in a 9 x 12 pan, place 1-2 tablespoons chicken mixture in the middle of the tortilla, and roll it up. Place in casserole dish, seam side down, and keep in mind you will be compactly filling the pan to be lined up with enchiladas. Repeat under all chicken mixture/ tortillas are gone.
  7. When pan is full (you may have more than one pan), use a ladle to add additional milk mixture over enchiladas casserole (generously), you should see some milk mixture on all sides of the casserole.
  8. Spread salsa evenly over the top of the enchiladas.
  9. Top with shredded cheese.
  10. Bake at 350 degrees (that's about 180 degrees in Australia) for 25-35 minutes until top is browned and it looks delicious.
  11. Serve with sour cream and salsa on the side.
**To make faster casserole style dish: (after completing up to step #5 above)
  1. Dip each tortilla in milk mixture & place in 9 x 12 baking dish (you may have enough to make a 2nd 8 x 8 batch too).
  2. Cover the entire bottom of pan, rip into pieces to hit all spots if necessary. We are going for a lasagna method with this version.
  3. Spoon chicken mixture evenly over tortillas (you will probably have enough to make a 2nd baking pan).
  4. Dip more tortillas in milk mixture and make another fully covering layer over chicken.
  5. Spread a thin layer of salsa over the top.
  6. Top generously with shredded cheese.
  7. Go back to #10 in the original directions.

Shrimp Scampi Ravioli


I bought some fantastic looking organic 4-cheese ravioli this week, and really didn't want to top it with a red sauce-- I needed something special.

My four year old has decided he "loves shrimp" (that's American for "prawns"). He especially likes prawn crackers, which I had never seen prior to living in Australia-- but we can expand on his ravenous appetite for those another day.

Anyway, I decided I wanted to make a shrimp scampi style concoction to put over the designer ravioli. Don't you just love it when you throw something together and it all works out like it's supposed to.

And I was very happy with the way this came out because a) it was really fast b) it was really good c) my husband and kids loved it. I actually think this would be an excellent meal to serve for a dinner party if you are cooking everything yourself because it all came together so quickly, and with such ease.

Here's what I did:

Prep time: 15 minutes
Cooking time: (including boiling water for pasta) 20 minutes

Ingredients:
  • 1 lb. (1/2 kilo) cooked peeled shrimp- tails off, rinsed, & chopped into large pieces
  • 2 large handfuls fresh spinach- chopped
  • 4-7 garlic cloves- cut in thick slices
  • Garlic powder or granulated garlic
  • Olive oil -approximately 1/4 cup-1/3 cup
  • 2-3 tablespoons butter
  • 1 cup frozen peas
  • Splash of white wine
  • 1/2 teaspoon salt
  • 1 handful Parmesan cheese - grated or shredded + a little extra to use when serving
  • Ravioli or pasta of your choice
Tip:
  • It's best to take tails off shrimp (I cut the shrimp in thirds- my feeding toddlers mentality- but I highly endorse it for anyone), slice garlic, & chop spinach before doing anything else, with everything pre-prepped the sauce cooks in about 10 minutes
Technique:
  1. Start a large pot of water boiling for the pasta-- you should probably start cooking the sauce when you add the pasta to the water-- the sauce will probably about the same time to cook as the pasta- give or take a couple minutes
  2. Put chopped shrimp in a bowl and sprinkle with garlic powder or granulated garlic
  3. In a large nonstick pan warm olive oil and butter on medium low heat
  4. When oil and garlic are warm add the sliced garlic, reduce heat to low, and cook for about 5 minutes
  5. Using a slotted spoon (unless you have a better method), remove garlic slices and save them for use later in the process
  6. Add a splash of white wine to the pan
  7. Add the frozen peas to the pan and let pan heat up again- about 1 minute
  8. Add chopped cooked shrimp and chopped spinach to pan and mix thoroughly
  9. Sprinkle about 1/2 tsp. of a good salt over the top and stir (if in Australia, I prefer Murray River Pink Salt-- I just it's amazing)
  10. When spinach is wilted/ cooked, using a garlic press- squeeze the cooked garlic into the pan and stir
  11. Add handful of Parmesan cheese, stir thoroughly and turn off heat
  12. Serve shrimp over pasta and top with reserved Parmesan cheese
You may (or may not) understand how satisfying it is when my picky three year old (not to be mistaken for my gourmet eating four year old),-- wolfs down a nice size bowl of this. Um, did I mention he normally only eats dinner if it's macaroni & cheese or chicken schnitzel (for my American friends, chicken schnitzel is to Australia, what chicken nuggets are to America).

And here's the four year old who loves sushi, tandoori chicken, and sweet chili sauce on everything. Notice the pretend Parmesan cheese, he insisted on serving everyone some.